Introduction
A 2D platformer is a classic game genre where players navigate through levels, jumping between platforms, dodging obstacles, and engaging enemies from a side-view perspective. This tutorial guides you through creating a physics-based 2D character controller in Unity using the Rigidbody2D component, perfect for building engaging platformer games.
Prerequisites
Before starting, ensure you have:
- Unity installed (version 2020.3 or later recommended).
- A 2D project set up with a level containing platforms (sprites with 2D colliders).
- Basic knowledge of Unity's interface and C# scripting.
Step-by-Step Guide
Follow these steps to create a responsive 2D character controller:
1. Set Up the Player
- Create a new GameObject named "Player" in your scene.
- Add a child GameObject named "player_sprite" with a Sprite Renderer component.
- Assign a sprite to "player_sprite" and nest it under the "Player" object.
- Ensure your level sprites have 2D colliders to prevent the player from falling through.
2. Create the Character Controller Script
Create a new script named CharacterController2D and attach it to the "Player" GameObject. This script handles movement, jumping, and camera following.
using System.Collections;
using System.Collections.Generic;
using UnityEngine;
[RequireComponent(typeof(Rigidbody2D))]
[RequireComponent(typeof(CapsuleCollider2D))]
public class CharacterController2D : MonoBehaviour
{
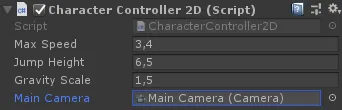
public float maxSpeed = 3.4f;
public float jumpHeight = 6.5f;
public float gravityScale = 1.5f;
public Camera mainCamera;
bool facingRight = true;
float moveDirection = 0;
bool isGrounded = false;
Vector3 cameraPos;
Rigidbody2D r2d;
CapsuleCollider2D mainCollider;
Transform t;
void Start()
{
t = transform;
r2d = GetComponent();
mainCollider = GetComponent();
r2d.freezeRotation = true;
r2d.collisionDetectionMode = CollisionDetectionMode2D.Continuous;
r2d.gravityScale = gravityScale;
facingRight = t.localScale.x > 0;
if (mainCamera)
{
cameraPos = mainCamera.transform.position;
}
}
void Update()
{
if ((Input.GetKey(KeyCode.A) || Input.GetKey(KeyCode.D)) && (isGrounded || Mathf.Abs(r2d.velocity.x) > 0.01f))
{
moveDirection = Input.GetKey(KeyCode.A) ? -1 : 1;
}
else
{
if (isGrounded || r2d.velocity.magnitude < 0.01f)
{
moveDirection = 0;
}
}
if (moveDirection != 0)
{
if (moveDirection > 0 && !facingRight)
{
facingRight = true;
t.localScale = new Vector3(Mathf.Abs(t.localScale.x), t.localScale.y, transform.localScale.z);
}
if (moveDirection < 0 && facingRight)
{
facingRight = false;
t.localScale = new Vector3(-Mathf.Abs(t.localScale.x), t.localScale.y, t.localScale.z);
}
}
if (Input.GetKeyDown(KeyCode.W) && isGrounded)
{
r2d.velocity = new Vector2(r2d.velocity.x, jumpHeight);
}
if (mainCamera)
{
mainCamera.transform.position = new Vector3(t.position.x, cameraPos.y, cameraPos.z);
}
}
void FixedUpdate()
{
Bounds colliderBounds = mainCollider.bounds;
float colliderRadius = mainCollider.size.x * 0.4f * Mathf.Abs(transform.localScale.x);
Vector3 groundCheckPos = colliderBounds.min + new Vector3(colliderBounds.size.x * 0.5f, colliderRadius * 0.9f, 0);
Collider2D[] colliders = Physics2D.OverlapCircleAll(groundCheckPos, colliderRadius);
isGrounded = false;
if (colliders.Length > 0)
{
for (int i = 0; i < colliders.Length; i++)
{
if (colliders[i] != mainCollider)
{
isGrounded = true;
break;
}
}
}
r2d.velocity = new Vector2((moveDirection) * maxSpeed, r2d.velocity.y);
Debug.DrawLine(groundCheckPos, groundCheckPos - new Vector3(0, colliderRadius, 0), isGrounded ? Color.green : Color.red);
Debug.DrawLine(groundCheckPos, groundCheckPos - new Vector3(colliderRadius, 0, 0), isGrounded ? Color.green : Color.red);
}
}
3. Configure the Player Components
Attaching the CharacterController2D script automatically adds a Rigidbody2D and CapsuleCollider2D to the "Player" GameObject.
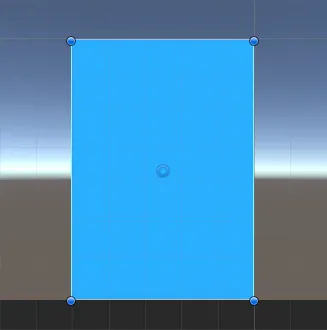
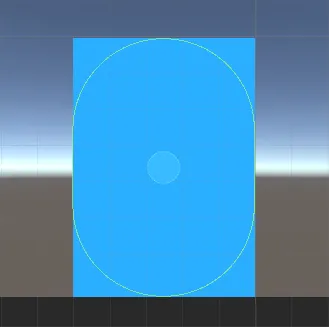
- Adjust the CapsuleCollider2D to match the player's sprite dimensions.
- Ensure no additional colliders are attached to child objects.
- Assign the main camera to the
Main Camerafield in the script to enable camera following.
4. Test the Controller
Your 2D character controller is now ready! Play the scene to test:
- Use A and D keys to move left and right.
- Press W to jump when grounded.
- Ensure the camera follows the player smoothly.
Conclusion
You've successfully created a 2D character controller for a platformer game in Unity. Experiment with the maxSpeed, jumpHeight, and gravityScale variables to fine-tune the feel of your controller. Check out our other Unity tutorials for more game development tips!